Layout and groups
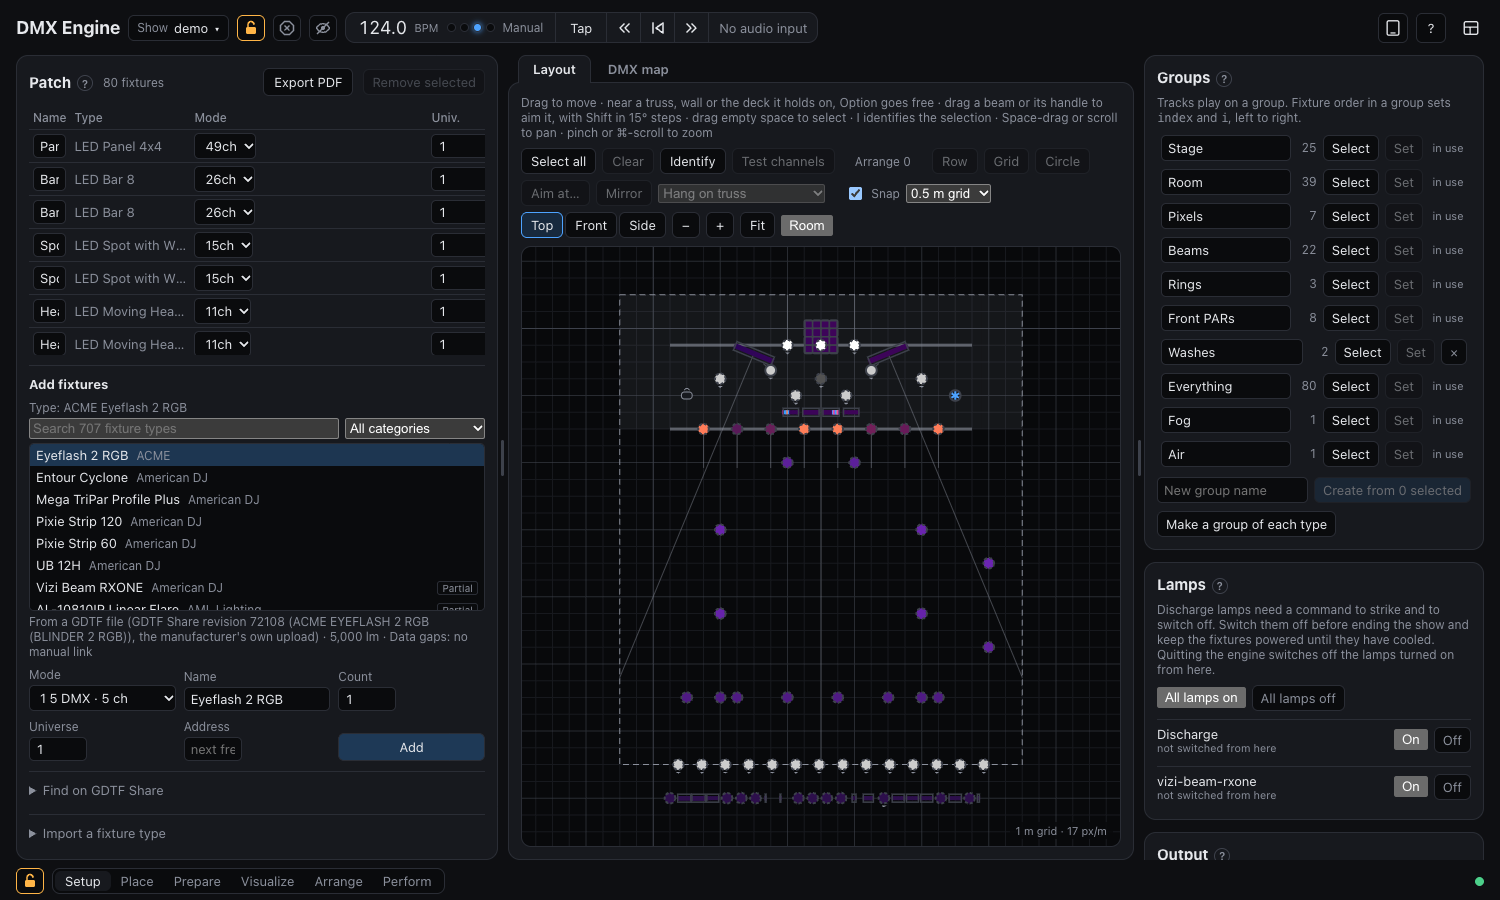
Effects need to know where the lights are, so a wave can roll across them. The Rig layout panel is a plan of the room, seen from above.
Place the fixtures
Drag a fixture to where it hangs. The layout is measured in meters and has no edges, so a wide stage and a tall club plot both fit.
- Pan by scrolling or Space-dragging; zoom by pinching or ⌘-scrolling. Fit frames the whole rig.
- Moves snap to the grid (0.25 to 2 m). Hold Option to place freely, or turn Snap off. The arrow keys nudge by a grid step. Trusses, walls and the deck hold a fixture too, as below.
- Fixture names draw above everything else. You can still click a name to select the fixture or drag it to move.
Selecting a fixture floats its controls over the top of the layout: rotation, size and mounting. Pixel bars and panels get an outline around the whole fixture, so their shape stays visible when the pixels are dark.
Moving heads
Select any fixture to set its mounting, height and facing, which the 3D stage draws. Fixtures without pan and tilt also have a Lean: how many degrees the beam leans from straight out of the base towards the way the fixture faces, 30° for a PAR hung to light the front of the stage. LED bars and panels lie across their beam, so one lies flat until you say otherwise: On a wall stands a panel upright with its first row at the top, and Roll turns it around its beam, 90° standing a bar on end. The plan keeps showing them as laid out, so a pixel's place in rigx and rigy doesn't change. Fixtures with a gobo wheel have Gobos, to give it pictures.
Select a head to set how it hangs: the mounting (hanging, standing, on a wall), which way it faces (the arrow on the layout), the pan and tilt values where the beam points straight out of the base (home), invert pan / tilt, which lets a mirrored pair move symmetrically from the same programming, the height of the head above the floor, which the Aim effect needs to point beams at a spot, and Move time: with a Move in dark lane, how long the head needs to get anywhere and stop. It only sets off for a flash with at least this long to go, and otherwise flashes where it already is, so raise it if you see the end of a move and lower it if a head stops moving (300 ms unless set). Heads start at 4 m hanging, 0.5 m standing and 3 m on a wall. The stage then draws each beam where it really points: solid towards the floor, ending where it meets it (but never longer than one and a half times the head's height), and dashed towards the ceiling.
To check the settings against the real fixtures, Point home aims the selected heads straight out of their base, and Point forward tilts them 90° to their front. Release, or switching to a layout without this panel, gives them back to the show.
Trusses, walls and the deck
With a room set up, dragging a single fixture near part of it holds it there, and the part lights up to show which:
- A truss takes it at the truss's height, hanging and facing square to it, a grid step at a time along it.
- A wall takes it on the wall, facing into the room. A panel dropped there stands upright, ready to go.
- The floor or the deck takes it standing on it, when you drag down to it in Front or Side. A fixture already standing rises and falls with the deck as you move it in Top.
Hold Option to pass by and place it freely. Several fixtures dragged at once keep their shape and aren't held, because a truss would pile them on one spot; use Hang on truss in the tools instead, which spreads the selected fixtures evenly along the truss you pick, keeping the order they're in.
A fixture doesn't stay attached: moving a truss later leaves its fixtures where they are.
Mirror a rig
Most rigs are symmetrical, so you only need to place half. Select one side and press Mirror in the tools. Each selected fixture is mirrored left to right across the middle of the room, or of the rig if there's no room:
- The nearest fixture of the same type and mode on the other side moves there, keeping its name and DMX address. With both sides selected, the left side is the one that's mirrored.
- If there's none left, a new one is added at the next free address, in the same universe and groups, and numbered after the others.
Its height, mounting and lean are copied, its facing turns the other way, and Invert pan is flipped so the pair moves as mirror images from the same programming. It all undoes as one step.
Top, front and side
Top, Front and Side above the layout switch between looking down on the plan, looking at the rig from the audience, and looking at it from its right. Front and Side show the room, the deck and the trusses at their real height, and bars and panels the way they're mounted. Dragging a fixture in them moves it up and down as well, so you can set its height by eye; the move is snapped to the grid and undoes as one step.
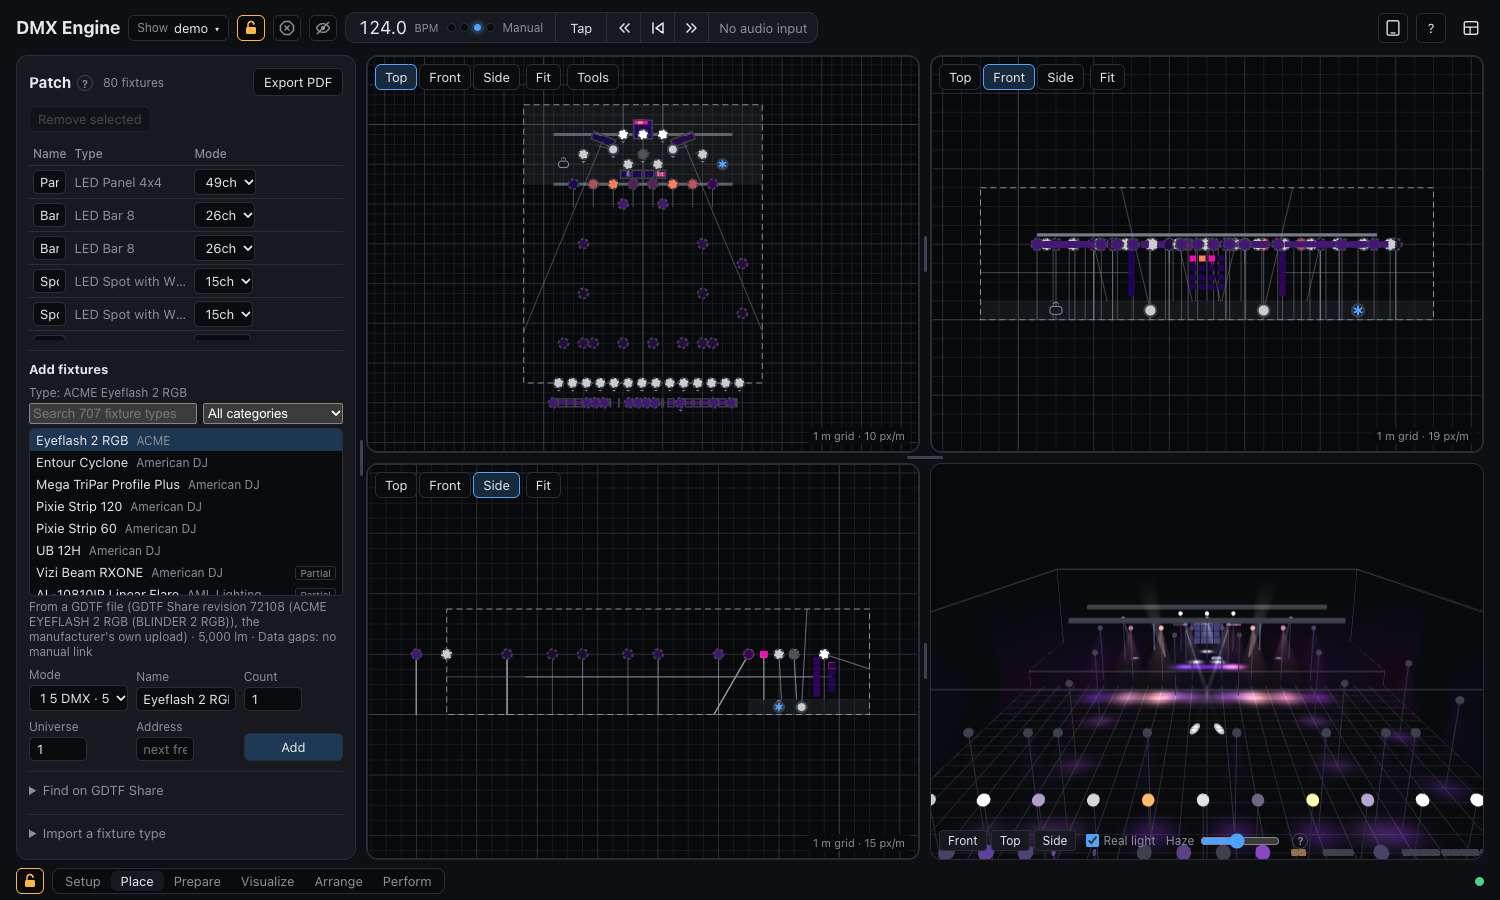
The Place layout shows the three views and the 3D stage together beside the Patch list, with the fixture's controls over the top view. In a panel too short for its header, as here, the view fills the panel and Tools holds the rest: selecting, arranging, snapping and the room. Selecting a fixture in one view selects it in all of them. Add more views to any layout with the Rig view panel.
Aim the beams
Every fixture draws its beam as a line to where it lands, and a selected fixture shows how wide the beam is, with a round handle at its end. Drag the handle, or the line itself, to aim the beam: the fixture's facing and Lean follow. Hold Shift while you drag to move both in 15° steps, for simple angles. With several fixtures selected they all move by the same amount, so a fan stays a fan. A beam pointing straight at you in a view has its handle beside the fixture.
To point several fixtures at one spot, select them, press Aim at… in the tools and click the spot in any view. From the top it's on the floor or the stage deck; from the front or side, it's as deep in the room as the beams land now, on average. Hold Shift for 15° steps, and Esc cancels. Moving heads in the selection are left alone.
While something is selected, a press near it always takes hold of it, even with another fixture in the way, so a crowded rig can't change your selection by accident. A click that doesn't drag still selects the fixture under it, and Shift or ⌘ add and remove fixtures as usual.
A bar or panel keeps its rotation, because that also lays out its pixels, so a handle only leans it. Moving heads have the line, following the show, but no handle: where they point comes from your clips.
Groups
A group is a set of fixtures that a track drives. Groups can be any size and may overlap.
- Select fixtures, in the patch list or on the layout.
- Type a name in New group name in the Groups panel and add it.
- Select picks a group's fixtures again; you can also replace its fixtures with the current selection.
Shift-click in the patch list selects a range; ⌘-click adds or removes one fixture.
Make a group of each type does the usual start in one step: a group of each fixture type in the patch, named after the type, and an Everything group when there are several types, each in order left to right. Types that already have a group of exactly their fixtures are left out, so it's safe to press again after adding more fixtures. Rename or change the groups afterwards as you like; ⌘Z takes them all back at once.
What formulas see
Formulas see positions as x and y in the track's own group, and the group keeps its proportions: the longer side runs from 0 to 1, and the shorter side uses the same scale, centered at 0.5. A group 10 m wide and 4 m high has x from 0 to 1 and y from 0.3 to 0.7. A flat group or a single fixture sits at 0.5. So circles stay circular and rotating patterns keep their shape.
Use rigx and rigy for positions across the whole rig, shared by every track and unaffected by position effects. Choose these for a pattern that has to line up across different groups.
In a group, each pixel of a pixel fixture counts like a fixture, so x, y and index run along a bar and a wave rolls across PARs and pixels alike. See Moving with the music.